
TM 5-3895-385-23-2
0434
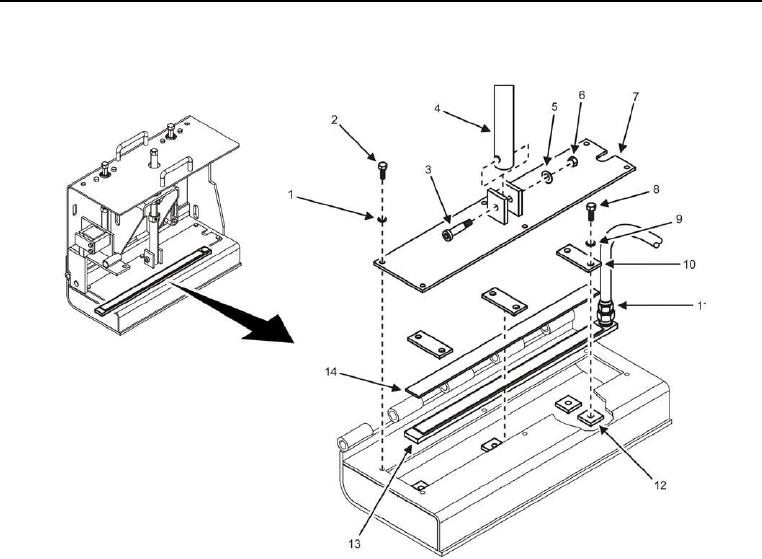
Screed Extension Heater Element Removal
Figure 3. Screed Extension Heater Element -- Removal/Installation.
1. Remove bolt (Figure 3, Item 3), flat washer (Figure 3, Item 5), and locking nut (Figure 3, Item 6) from bolt-on
screed extension heater element cover (Figure 3, Item 7). Discard locking nut.
2. Adjust lower screw housing (Figure 3, Item 4) to provide adequate clearance.
3. Remove six bolts (Figure 3, Item 2) and lock washers (Figure 3, Item 1) from bolt-on screed extension heater
element cover (Figure 3, Item 7). Discard lock washers.
4. Loosen jam nut and nut (Figure 3, Item 11) on bolt-on screed extension heater element (Figure 3, Item 13),
and remove bolt-on screed extension heater element cover (Figure 3, Item 7) from bolt-on screed extension.
5. Remove six bolts (Figure 3, Item 8) and lock washers (Figure 3, Item 9) from bolt-on screed extension
mounting holes (Figure 3, Item 12). Discard lock washers.
6. Remove three hold down brackets (Figure 3, Item 10) from bolt-on screed extension mounting holes (Figure
3, Item 12).
7. Remove hold down bar (Figure 3, Item 14) from bolt-on screed extension heater element (Figure 3, Item 13).
8. Remove bolt-on screed extension heater element (Figure 3, Item 13) from bolt-on screed extension.
END OF TASK