
justment for the mat texture while paving. Never
lower strike-offs below screed bottom. Important!
Always make strike-off adjustments when screed
and asphalt are hot. If the asphalt is cold,
adjusting bolts and brackets will bend before the
strike-off moves and the entire adjustment
assembly is damaged.
4. Whenever strike-offs are to be re-adjusted, it is
best to lower both sides, then use the top adjusting nut
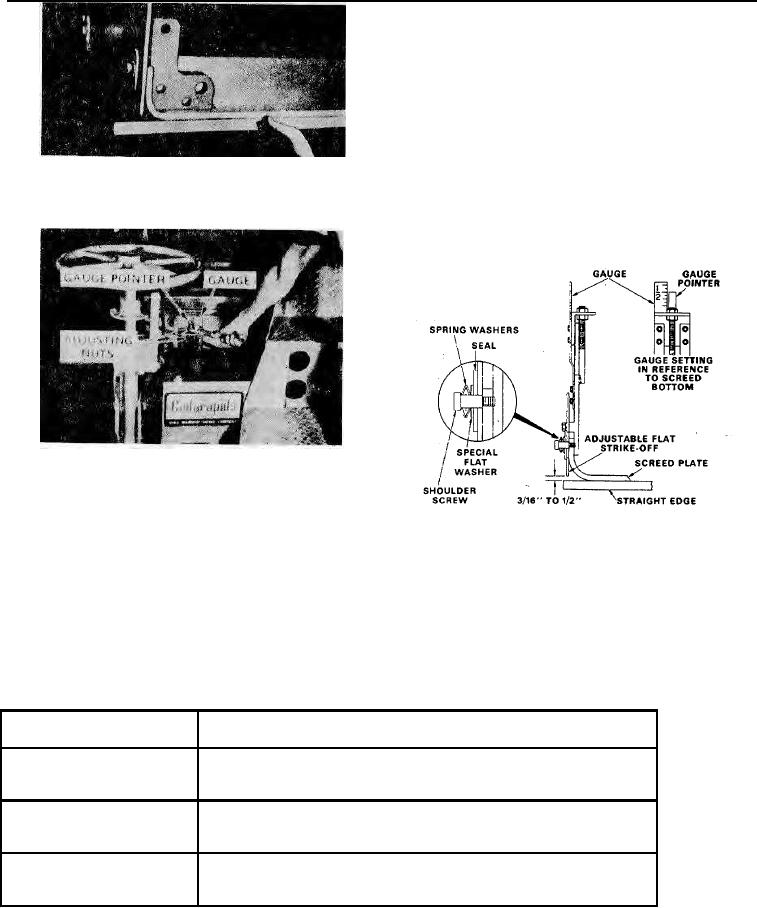
Checking Height of Flat Strike-off
at each of the four adjustment points to pull the strike-
Figure 23
offs up to the desired gauge readings. This is a
uniform movement of the strike-offs and
Adjusting Height of Strike-off
Figure 24
ZEROING AND ADJUSTING STRIKE-OFFS
Cross-section - Flat Strike-off Assembly
1. After strike-offs are properly assembled to
Figure 25
sereed.
lower strike-offs until flush with screed
bottom. Use the template straight edge to check
position of strike-offs. See Figure 23.
2. Then, adjust gauges to "0" setting with gauge
pointers.
3.
Raise strike-offs above screed bottom
according to the chart. (Shown below.) Make the final
ad-
Height of
Flat Strike-off
Characteristics of Asphalt
"+1/16"
Standard (Normal Mat Conditions)
1/4"
Aggregate Size; Sand to 1" Minus Aggregate
- 0"
Mat Thickness: 1" to Maximum Thickness
Alternate (Fines Materials with Thin Mat)
3/16" + 1/16"
Aggregate Size: Fines to 1/4" minus sand
Mat Thickness: Minimum 1/2" to 1" mat
3/8" + 1/8"
**Alternate (Coarse Materials with Thick Mat)
3/8"
*Aggregate Size: 1" minus 1" maximum Recommended
__- 1/16"
Mat Thickness: 2" to maximum thickness
*Pavers have laid top size material of 3" minus, however accelerated wear can be expected.
**Only if tearing due to flats in aggregate. With flat plate strike-off it is possible to raise to 1",there-
fore, no strike-off effect.
Page 61