
TM 5-3895-385-23-2
0350
Battery-Charging Alternator Pulley Removal
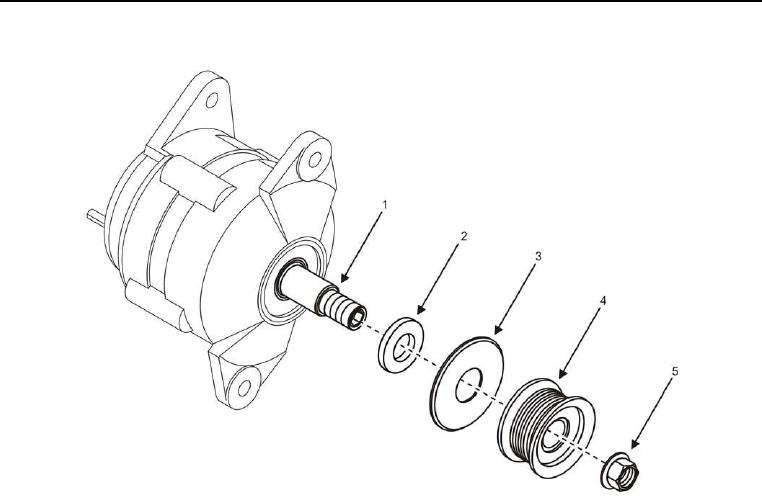
Figure 5. Alternator Pulley -- Removal/Installation.
1. Perform steps 1 4 of the Battery Charging Alternator Removal task.
2. Remove stem nut (Figure 5, Item 5) from alternator stem (Figure 5, Item 1).
3. Remove alternator pulley (Figure 5, Item 4), washer cap (Figure 5, Item 3), and flat washer (Figure 5, Item 2)
from alternator stem (Figure 5, Item 1).
END OF TASK
Battery-Charging Alternator Pulley Installation
1. Install flat washer (Figure 5, Item 2), washer cap (Figure 5, Item 3) and alternator pulley (Figure 5, Item 4)
onto alternator stem (Figure 5, Item 1).
2. Install alternator stem nut (Figure 5, Item 5) onto alternator stem (Figure 5, Item 1), and torque to 30 ft-lb (40
Nm).
3. Perform steps 1 7 of the Battery-Charging Alternator Installation task.
END OF TASK