
TM 5-3895-385-23-2
0324
Crankshaft Front Oil Seal Installation -- Continued.
7. Stop rotating replacer screw (Figure 6, Item 2) once crankshaft seal replacer (Figure 6, Item 1) contacts front
gear cover (Figure 6, Item 4).
8. Remove replacer screw (Figure 6, Item 2) and crankshaft seal replacer (Figure 6, Item 1) from crankshaft
nose (Figure 5, Item 2).
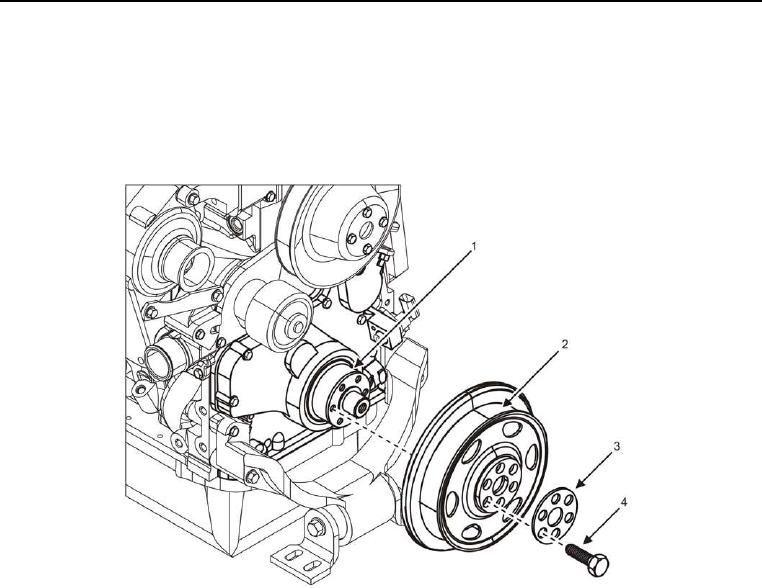
Figure 7. Crankshaft Pulley -- Installation.
CAUTION
Make sure to align the mark on the front of the crankshaft with the TDC mark on the front of the
pulley for proper alignment for installation. Failure to comply may cause damage to equipment.
9. Install crankshaft pulley (Figure 7, Item 2) onto crankshaft nose (Figure 7, Item 1), spacer (Figure 7, Item 3),
and install six bolts (Figure 7, Item 4) into crankshaft nose and hand tighten.
10. Alternately torque bolts (Figure 7, Item 3) to 37 ft-lb (50 Nm).
END OF TASK