
TM 5-3895-385-23-2
0401
WEATHER PROOF CONNECTOR REPAIR -- CONTINUED.
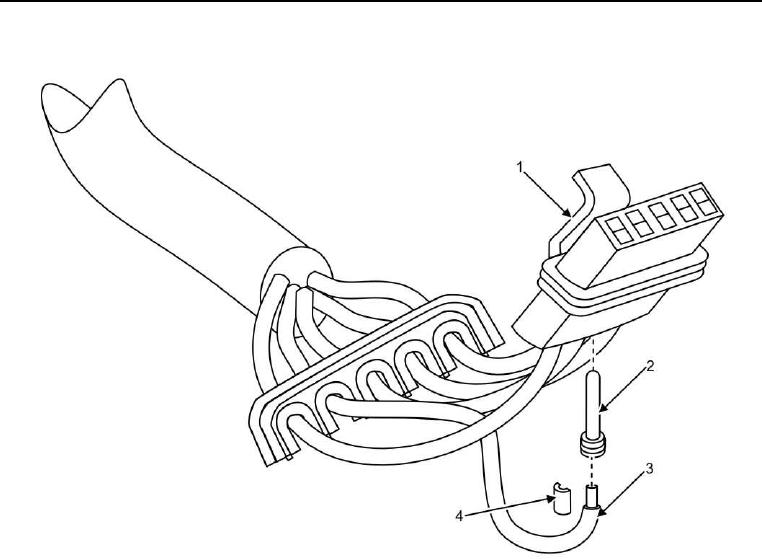
Figure 7. Weather Proof Connector Repair.
2. Remove terminal (Figure 7, Item 2) and wire (Figure 7, Item 3) from connector (Figure 7, Item 1).
3. Cut and remove terminal (Figure 7, Item 2) from wire (Figure 7, Item 3).
4. Remove one-quarter of an inch (6 mm) of insulation (Figure 7, Item 4) from end of wire (Figure 7, Item 3).
NOTE
Ensure all strands of wire are inside terminal when installing.
5. Install wire (Figure 7, Item 3) into terminal (Figure 7, Item 2), and crimp terminal.
6. Insert terminal (Figure 7, Item 2) and wire (Figure 7, Item 3) into connector (Figure 7, Item 1).
7. Close and latch secondary lock (Figure 6, Item 2) on connector (Figure 6, Item 1).
END OF TASK