
TM 5-3895-385-23-2
0353
Crankshaft Front Oil Seal Installation -- Continued.
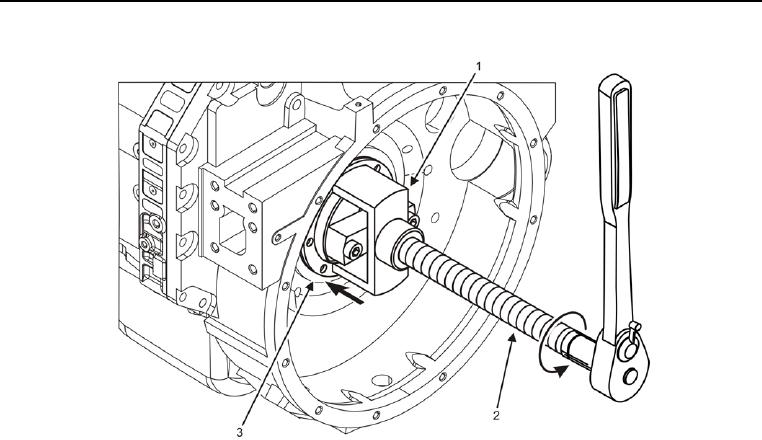
Figure 5. Crankshaft Seal Replacer
- Installation.
NOTE
Ensure crankshaft rear oil seal is positioned squarely into the crankshaft rear oil seal seat.
5. Install crankshaft seal replacer (Figure 5, Item 1) onto replacer screw (Figure 5, Item 2).
6. Rotate crankshaft seal replacer (Figure 5, Item 1) toward crankshaft rear oil seal (Figure 4, Item 1) by rotating
crankshaft seal replacer (Figure 5, Item 1) counterclockwise until it contacts crankshaft rear oil seal.
CAUTION
Avoid over-tightening replacer screw after the crankshaft seal replacer contacts the flywheel
housing. Failure to comply may cause damage to equipment.
7. Rotate replacer screw (Figure 5, Item 2) counterclockwise while holding crankshaft seal replacer (Figure 5,
Item 1), and install crankshaft rear oil seal (Figure 4, Item 1).
8. Stop rotating replacer screw (Figure 5, Item 2) once crankshaft seal replacer (Figure 5, Item 1) contacts
flywheel housing (Figure 5, Item 3).
9. Remove replacer screw (Figure 5, Item 2) and crankshaft seal replacer (Figure 5, Item 1) from crankshaft
nose (Figure 4, Item 2).
END OF TASK