
TM 5-3895-385-23-2
0242
Screed Heater Element Removal -- Continued.
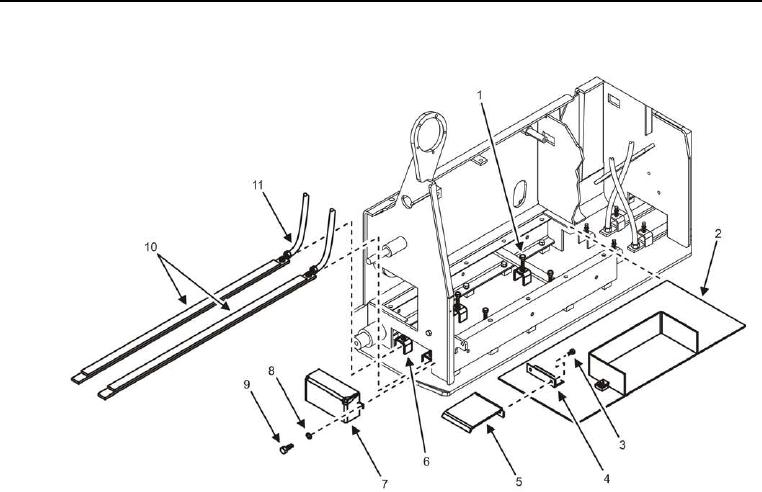
Figure 3. Screed Heater Element -- Removal/Installation.
5. Remove two bolts (Figure 3, Item 3) and cover bracket (Figure 3, Item 5) from mounting bracket (Figure 3,
Item 4).
6. Remove screed heater element cover (Figure 3, Item 2) from screed.
7. Remove two bolts (Figure 3, Item 9), lock washers (Figure 3, Item 8), and end cover (Figure 3, Item 7) from
screed. Discard lock washers.
8. Remove three bolts along with nuts (Figure 3, Item 1) from retaining bracket (Figure 3, Item 6).
9. Remove screed heater element (Figure 3, Item 10) and power cord (Figure 3, Item 11) from screed.
END OF TASK
Screed Heater Element Installation
1. Install screed heater element (Figure 3, Item 10) and power cord (Figure 3, Item 11) onto the screed.
2. Install three bolts along with nuts (Figure 3, Item 1) onto retaining bracket (Figure 3, Item 6).
3. Install screed heater element cover (Figure 3, Item 2) onto screed.
4. Install cover bracket (Figure 3, Item 5) and two bolts (Figure 3, Item 3).
5. Install two bolts (Figure 3, Item 9), new lock washers (Figure 3, Item 8), and end cover (Figure 3, Item 7) onto
screed.