TM 5-3895-385-23-2
0243
Screed Electric Heat Box Removal -- Continued.
4. Remove four bolts (Figure 1, Item 7), eight flat washers (Figure 1, Items 8 and 10), four locking nuts (Figure 1,
Item 11), and screed electric heat box (Figure 1, Item 3) from bracket (Figure 1, Item 9). Discard locking nuts.
END OF TASK
Screed Electric Heat Box Disassembly
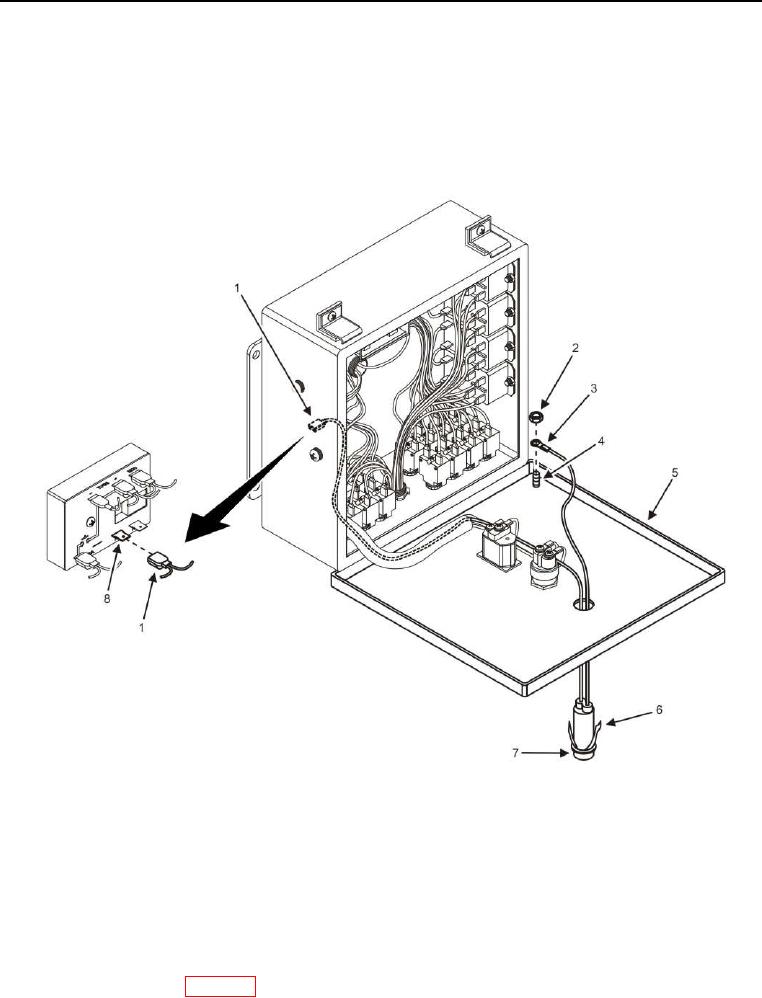
Figure 2. Red Light -- Removal.
CAUTION
Tag and label electrical wires prior to removal. Electrical wires must be installed correctly for
proper operation. Failure to comply may cause damage to equipment.
1. Lower screed electric heat box lid by loosening two screws and clamps on top of screed electric heat box.
2. Remove nut (Figure 2, Item 2) and ground wire (Figure 2, Item 3) from ground post (Figure 2, Item 4).
3. Remove red wire (Figure 2, Item 1) from N/C post (Figure 2, Item 8) on time delay relay, and remove wire
from spade connector (WP 0401).

