
TM 5-3895-385-23-2
0274
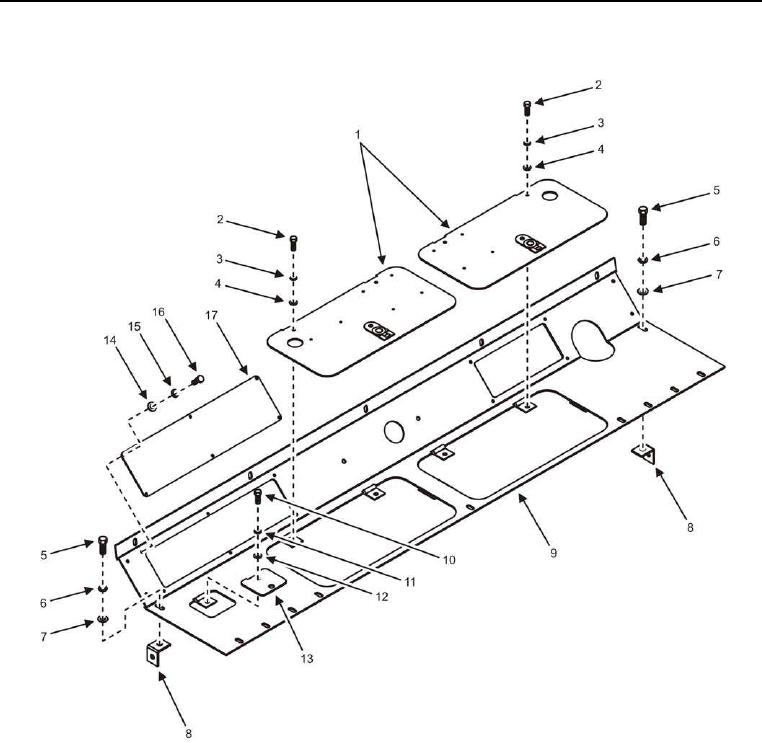
Floorboard Assembly Removal -- Continued.
Figure 4. Floorboard.
7. Remove four bolts (Figure 4, Item 2), lock washers (Figure 4, Item 3), flat washers (Figure 4, Item 4), and two
floorboard doors (Figure 4, Item 1) from floorboard assembly (Figure 4, Item 9). Discard lock washers.
8. Remove six bolts (Figure 4, Item 16), lock washers (Figure 4, Item 15), flat washers (Figure 4, Item 14), and
wireway cover (Figure 4, Item 17) from floorboard assembly (Figure 4, Item 9). Discard lock washers.
9. Remove two bolts (Figure 4, Item 5), lock washers (Figure 4, Item 6), flat washers (Figure 4, Item 7), and
mounting brackets (Figure 4, Item 8) from floorboard assembly (Figure 4, Item 9). Discard lock washers.
10. Remove bolt (Figure 4, Item 10), lock washer (Figure 4, Item 11), flat washer (Figure 4, Item 12), and access
plate (Figure 4, Item 13) from floorboard assembly (Figure 4, Item 9). Discard lock washer.
END OF TASK