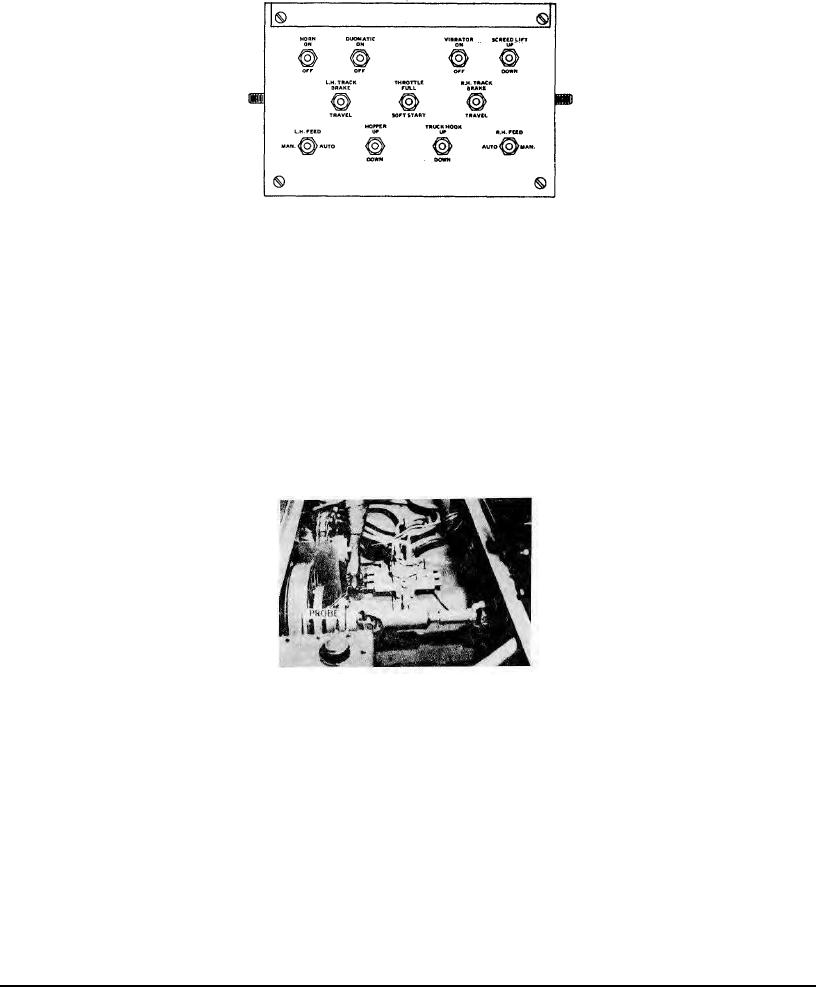
(8) Toggle Switches and Electrical Connections - A common cause of hydraulic system problems is electrical
failure due to a broken wire, loose connection, or an inoperative toggle switch. When a single hydraulic function fails to
occur while another works normally it is wise to check the wiring and switch details first before performing more complex
troubleshooting work.
Figure 7 - Paver Control Console
The recommended way to make a fast accurate check of the hydraulic system electrical components and the valve
units they control is as follows:
A - With paver engine stopped, set Control Key Switch to ON.
B - Using a small probe such as an Allen wrench (See Figure 8) exert finger pressure on the manual operating pin
of the solenoid valve for the troublesome system. (Refer to Figure 2 for correct coil location). Have the correct switch
toggle moved back and forth through all positions and feel for the "throw" of the valve plunger and spool. If a definite
back and forth movement is felt it is unlikely that any electrical or solenoid trouble is causing the problem. If no
movement can be felt in that solenoid, but can be felt in other solenoids you test, proceed as follows:
The entire solenoid valve control system is 12 Volt D.C. and can be worked on safely. When a suspected system
has been checked out as described in paragraph above and found to be bad, make the following elementary checks of
the wiring in order to restore a troublesome system to normal operation.
With the paver engine stopped and the Control Key Switch ON,
1 - Disconnect the hot wire from the coil at the quick connector.
2 - With the console toggle switch set to operate the troublesome function of the system, make a quick, light,
brushing contact of the hot wire with the ground wire screw to which the ground wire of the coil is connected. There
should be a visible sparking if electrical current is flowing to the end of the wire.
Figure 8 - Method Of Probe Testing Solenoid Valves
CAUTION: If a firm steady grounding contact is made the control system
overload protector will function and will have to be re-set.
(a) If there is a spark, check the ground wire connection of the coil for a break or loose connection.
(b) If there is no spark, proceed with Step 3.
3 - If the hot wire does not spark when tested as described in Step 2 above, loosen the four screws in console switch
panel and carefully tilt the panel to make the switch terminals and wiring accessible. Using a short piece of single
conductor insulated wire with ends bared, jumper from the center terminal to each of the outer terminals of the switch
which operates the troublesome unit. As this is done a second person should be making the spark test with the loose hot
wire at the solenoid.
(a) If there is a spark at the solenoid hot wire when one combination of switch terminals is jumpered the toggle
switch is defective and should be replaced.
(b) If there still is no spark at the solenoid hot wire despite the switch terminal jumpering, proceed with Step 4.
4 - If no sparking occurs at the solenoid hot wire when the switch terminals are jumpered, carefully touch the short
jumper wire to the center terminal of the switch and make a quick, light, brushing contact of the wire with a bare area of
the console case.
(a) If sparking occurs at the console case the cause of unit failure is probably an "open" or break
Page 35

