
TM 5-3895-385-23-2
0260
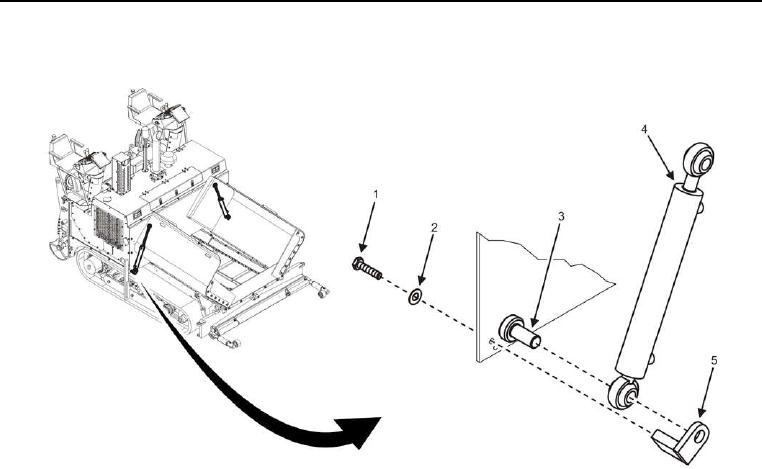
Hopper Rear Hydraulic Cylinder Removal -- Continued.
Figure 4. Hopper Rear Hydraulic Cylinder ― Removal.
6. Remove two bolts (Figure 4, Item 1), lock washers (Figure 4, Item 2), and mounting bracket (Figure 4, Item 5)
from hopper rear hydraulic cylinder (Figure 4, Item 4). Discard lock washers.
7. Remove hopper rear hydraulic cylinder (Figure 4, Item 4) from mounting pin (Figure 4, Item 3).
END OF TASK
Hopper Rear Hydraulic Cylinder Inspection
1. Inspect hydraulic fittings (Figure 3, Items 2 and 4) for cracks, stripped threading, wear, or deformities.
Replace hydraulic fittings if damaged.
2. Inspect hydraulic cylinder (Figure 4, Item 4) for significant scoring and pitting on cylinder shaft. Replace
hydraulic cylinder if damage is found.
3. Inspect hydraulic cylinder (Figure 4, Item 4) for evidence of leaking seals. If leaking seals are found, replace
hydraulic cylinder.
END OF TASK
Hopper Rear Hydraulic Cylinder Installation
1. Install hopper rear hydraulic cylinder (Figure 4, Item 4) onto mounting pin (Figure 4, Item 3).
2. Install mounting bracket (Figure 4, Item 5), two bolts (Figure 4, Item 1), and new lock washers (Figure 4, Item
2) onto hopper rear hydraulic cylinder (Figure 4, Item 4).