TM 5-3895-371-24 & P
(26)
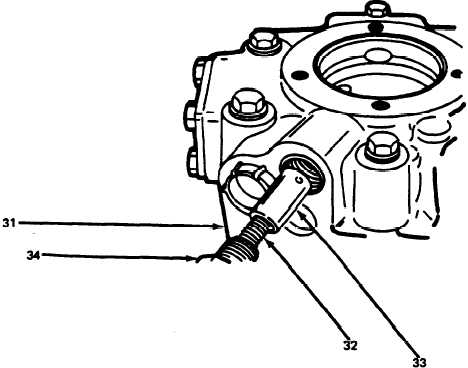
Inspect plunger (33) for scratches, nicks or burrs. Burnishing of the plunger at the point
of contact with the seats is normal. If wear can be felt, replace the plunger (33). Install the plunger
(33), spring (32), a new O-ring (311, shuttle valve plug (34) and low pressure relief valve plug (30).
(Refer to fig. 3-94.)
NOTE
Where it becomes necessary to replace the shuttle or
the plugs, be certain the faulty piece is replaced with
one of a like kind.
(27)
Insert body (46, fig. 3-60) in cover (35) with packings (46 and 43) and rings (44) and
secure with capscrews (2 and 60) and lockwashers (3). Torque to 11 Ib-ft (15 N•m). (Refer to fig, 3-95.)
TA 075967
Figure 3-94. Installing Low Pressure Relief Valve.
3-77