TM 5-3895-371-24 & P
(8)
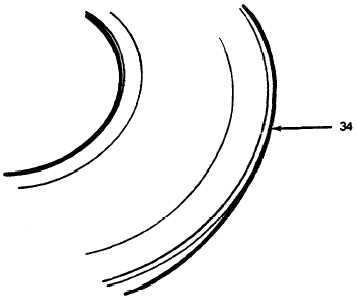
Examine wear plate (34, fig. 34). Circular patterns burnished on the surface of the cam
plate am normal. If circular patterns on the wear plate are extensive and can be felt with the fingernail,
or if angular scratches are evident, the plate must be discarded. (Refer to fig. 3-30).
(9)
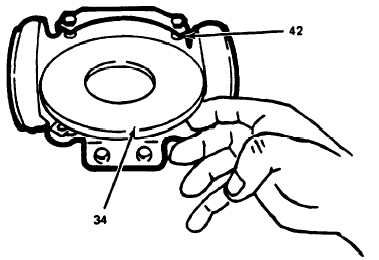
Match up dowel pin (33, fig. 3-4) in cam assembly (42) with dowel pin hole in wear
plate (34), and seat wear plate (34) in cam assembly (42). (Refer to fig. 3-31.) Check proper seating by
pushing down on first one edge and then the opposite edge of the wear plate in a rocking motion. If
any looseness is felt, remove cam plate and completely clean and compressed air dry both the cam
assembly (42, fig. 3-4) and wear plate (34) to remove any foreign particles from beneath wear plate.
Reposition wear plate in cam assembly (42) and repeat above procedure. If wear plate (34) refuses to
seat properly, check plate for flatness and replace if necessary.
Figure 3-30. Cam ‘Reaction to Wear” Plate.
Figure 3-31. Installing Cam Wear Plate.
3-29