TM 5-3895-373-34
A.
REMOVE - Continued.
7.
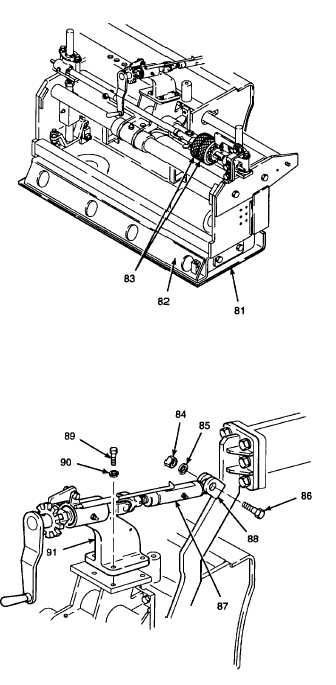
REMOVE EXTENSION SCREED PLATE.
a.
Raise screed about 12 in. (305 mm) per TM
5-3895-373-10. Place cribbing under main
screed only as safety precaution from screed
lowering.
b.
Remove extension screed plate (81) per
paragraph 2.71.
c.
Retract extension screed halfway per TM 5-
3895-373-10.
d.
Remove cribbing and fully lower screed per TM
5-3895-373-10.
e.
Lower extension screed base (82) to floor
surface using height adjustment knobs (83).
Refer to TM 5-3895-373-10.
8
THICKNESS CONTROL COMPONENTS.
a.
Remove hex nut (84), lockwasher (85), and
hex head cap screw (86). Lift link (87) from
screed arm bracket (88). Discard lockwasher.
b.
Remove hex head cap screws (89), and
lockwashers (90). Discard lockwashers.
c.
Remove screed thickness control mounting
bracket (91) and attached components from
extension screed.
GO TO NEXT PAGE
2-901